Amish White Bread Recipe (Soft, Fluffy Homemade Loaf)
This classic Amish White Bread recipe produces the softest, fluffiest homemade loaf with a perfectly golden crust. Simple ingredients, foolproof steps, and results that taste like they came straight from a farmhouse kitchen.

The Softest Homemade Loaf You Will Ever Bake
If you have ever bitten into a thick slice of soft, pillowy homemade bread still warm from the oven and thought, I need to know how to make this, you are in the right place. This Amish White Bread recipe is the one. It is the kind of bread that makes your whole kitchen smell like a bakery, the kind that disappears within hours, and the kind that ruins you forever for store-bought sandwich bread.
Amish bread has been a staple in American farmhouse kitchens for generations. Known for its impossibly soft crumb, lightly sweet flavor, and golden crust, the best Amish bread recipe is deceptively simple. There is no sourdough starter, no overnight ferment, no fancy technique. Just a short list of pantry ingredients and a little patience during the rise.
Why This Amish White Bread Recipe Works
What makes homemade Amish bread different from a standard white sandwich loaf? A few things stand out:
- A touch of sugar. Traditional Amish yeast bread uses more sugar than most white bread recipes. It feeds the yeast for a strong rise and gives the crumb a faintly sweet flavor that pairs beautifully with butter, jam, or a thick spread of peanut butter.
- Oil instead of butter. Using vegetable oil instead of butter keeps this loaf incredibly tender and moist for days, which is why it is sometimes called Amish soft bread.
- A simple two-rise method. Two rises build structure and flavor without requiring you to be a trained baker.
This recipe makes two full loaves, so you get one to eat now and one to freeze, share, or gift.
Using the right tools really does make a difference when it comes to bread baking. A proper 9x5-inch loaf pan with straight sides helps your bread rise evenly and develop that classic rectangular shape, while a reliable kitchen thermometer takes all the guesswork out of proofing your yeast.
Tips for Perfect Amish Loaf Bread Every Time
Bread baking rewards attention to a few key details. Here is what to keep in mind before you start:
Proof your yeast properly. Warm water between 100°F and 110°F is the sweet spot. Too cool and the yeast will not activate. Too hot and you will kill it. If you do not have a thermometer, aim for water that feels comfortably warm on your wrist, not hot.
Knead with intention. Eight to ten minutes of kneading by hand develops the gluten that gives this Amish white bread its structure and chew. The dough is ready when it is smooth and springs back slowly when you press a finger into it.
Chef's Tip: If the dough feels sticky while kneading, add flour one tablespoon at a time rather than dumping in a large amount. A slightly tacky dough produces a softer loaf than a stiff one.
Do not rush the second rise. That 30-minute rest in the loaf pan is what gives the bread its light, open crumb. The loaves should dome roughly one inch above the rim of the pan before they go into the oven.
What to Serve with Homemade Amish Bread
This Amish white bread recipe homemade is a true everyday loaf. Here are some favorite ways to enjoy it:
- Sliced thick and spread with salted butter and honey
- As the base for a classic BLT or grilled cheese
- Alongside a bowl of tomato soup or beef stew
- Toasted with a smear of strawberry jam for breakfast
- Cut into cubes and used for homemade stuffing or croutons
Ready to bake your own beautiful loaves? Here is the complete step-by-step Amish white bread recipe:
Amish White Bread Recipe (Soft, Fluffy Homemade Loaf)
This classic Amish White Bread recipe produces the softest, fluffiest homemade loaf with a perfectly golden crust. Simple ingredients, foolproof steps, and results that taste like they came straight from a farmhouse kitchen.
Ingredients
- 2 cups warm water, between 100-110°F / 38-43°C
- 3/4 tbsp active dry yeast, about 2.25 tsp or 1 standard packet
- 3/8 cups granulated white sugar, divided
- 1/4 cups vegetable oil, or canola oil
- 1 1/2 tsp salt
- 6 cups all-purpose flour, spooned and leveled, plus more for kneading
Instruction
In a large bowl, combine the warm water, 1 teaspoon of the sugar, and the active dry yeast. Stir gently and let sit for 5 to 10 minutes until the mixture becomes foamy and fragrant. This tells you the yeast is alive and active.
Add the remaining sugar, vegetable oil, and salt to the yeast mixture. Stir to combine.
Add the flour one cup at a time, stirring after each addition, until a soft dough forms and begins to pull away from the sides of the bowl.
Turn the dough out onto a lightly floured surface and knead for 8 to 10 minutes until the dough is smooth, elastic, and springs back when you poke it with your finger.
Place the dough in a lightly oiled bowl and turn it once to coat. Cover with a clean kitchen towel or plastic wrap and let rise in a warm spot for 1 hour, or until doubled in size.
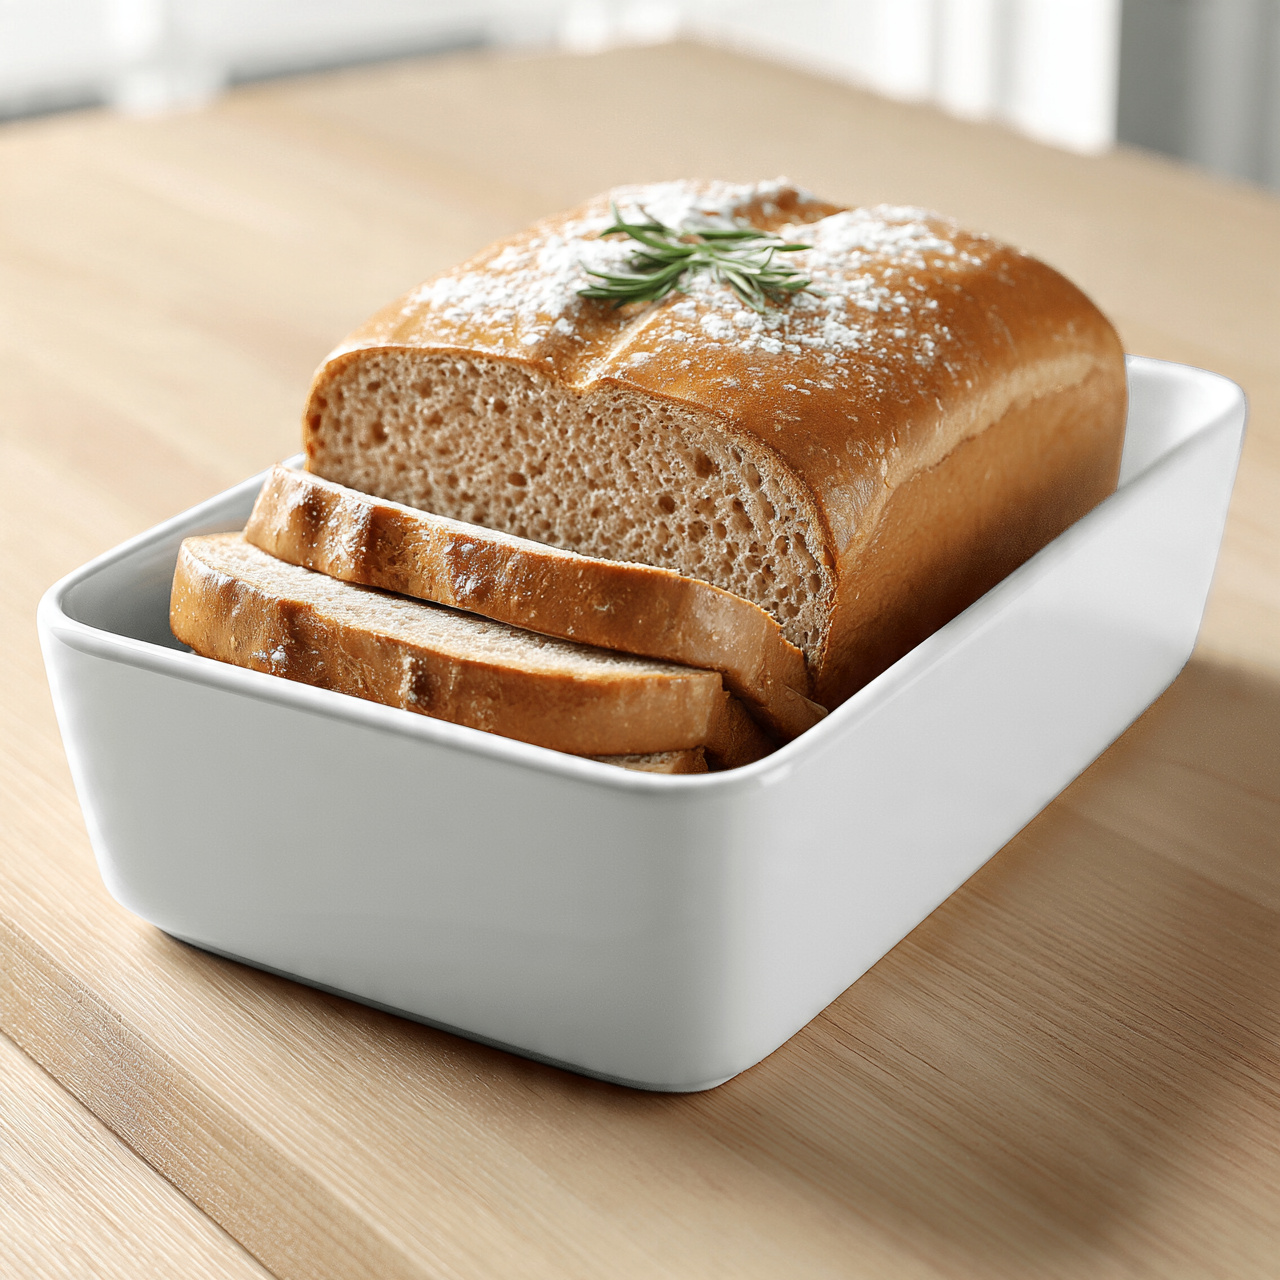
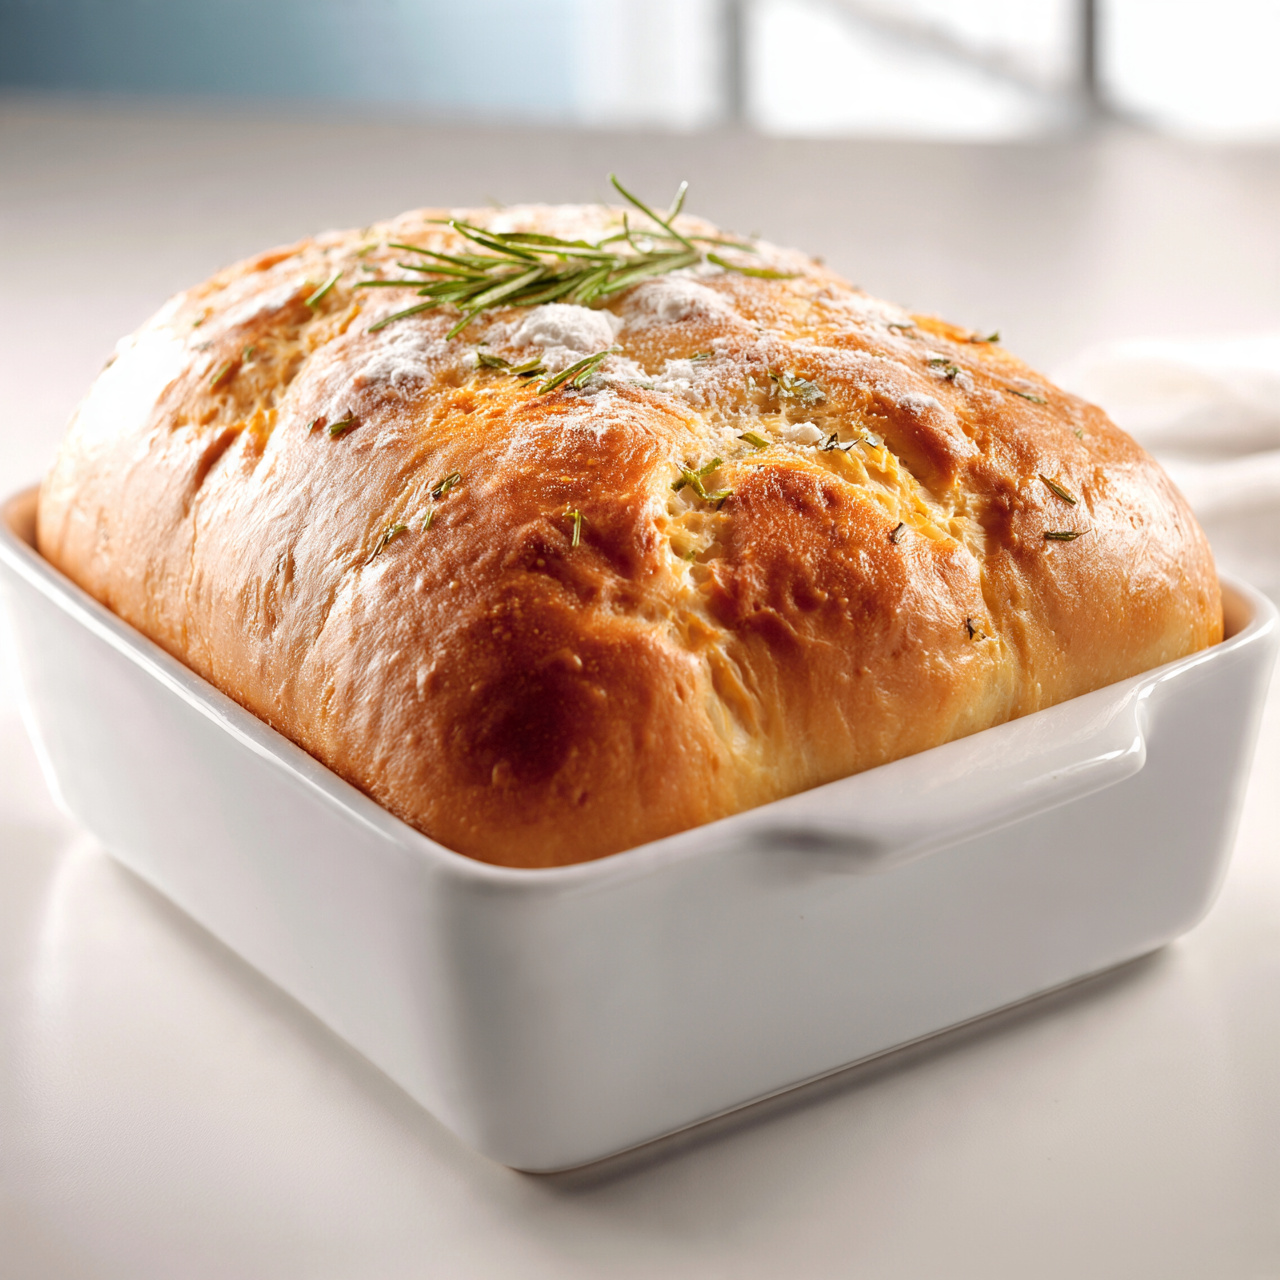
Punch down the dough and divide it evenly into two equal portions. Shape each portion into a smooth loaf and place into two greased 9x5-inch loaf pans.
Cover the pans loosely and let the loaves rise for another 30 minutes, until they dome about 1 inch above the rim of the pans.
Preheat your oven to 350°F (175°C). Bake the loaves for 25 to 30 minutes, until the tops are deep golden brown and the loaves sound hollow when tapped on the bottom.
Remove from the oven and let the loaves cool in the pans for 5 minutes, then transfer to a wire rack to cool completely before slicing.
Equipment
- Two 9x5-inch loaf pans
- Large mixing bowl
- Wooden spoon or dough whisk
- Wire cooling rack
- Kitchen towel or plastic wrap
- Measuring cups and spoons
Notes
Storing and Freezing Your Amish Bread
One of the best things about this Amish loaf bread is how well it keeps. Once fully cooled, wrap each loaf tightly in plastic wrap or seal it inside an airtight bag. It will stay soft at room temperature for up to four days.
For longer storage, slice the cooled loaf first, then freeze in a zip-top bag with a sheet of parchment between slices. Individual pieces can go straight from freezer to toaster whenever you need them. This makes it easy to always have homemade Amish bread on hand without baking every week.